<< Chapter | < Section | Table Of Contents | Section > | Chapter >>
12.
Creatures, Droids, And Soldiers
Depending upon your profession, skills, and standing with the Empire or Rebel Alliance, you may be able to control animals, droids or even soldiers at different points in the game.
12.1.
Creature Taming
The Creature Handler gains the ability to tame, train, and control wild animals. To tame a creature, the handler must locate an infant (identifiable by their small size, or by the label "baby" next to their names). Most often they are found as part of herds or packs.
To tame a creature as a pet, you must approach it very slowly (to avoid scaring it away), and then access its radial menu and select Tame. If you do not possess the skills to tame a creature, Tame will not appear on the radial menu. As you gain new skills, you' ll learn how to tame new types of creatures.
After selecting Tame, remain close to the creature while your character performs a series of actions to calm and befriend the creature. Taming is not automatic: the type of creature, its age, and your taming skill all affect the outcome.
NOTE: If you fail an attempt to tame a dangerous creature, the animal might attack you.
< < < TRANSMISSION OVERRIDE: REROUTING TO NEW SIGNAL> > >
I'M NOT MUCH FOR KEEPIN' ANIMALS. I' M AT HOME SURROUNDED BY POWER CONVERTERS AND STRIPPED HYPERDRIVES, AND PETS ONLY GET UNDERFOOT. BUT I DO KNOW THAT CREATURE TAMING IS AN ART, NOT A SCIENCE. IF YOU' RE LOOKIN' FOR A PET, START WITH SOMETHIN' SMALL AND PEACEFUL. A GNORT ISN'T LIKELY TO TEAR OUT YOUR THROAT WHEN YOU STARTLE IT ....
< < < RESUMING NORMAL DATA TRANSMISSION> > >
PET COMMANDS
Once you have successfully tamed a creature, a new set of commands will be available via its radial menu:
- Store: Puts the creature in your Datapad for later use. Select Call from the creature 's radial menu to remove it.
- Train: Allows you to teach your pet verbal commands. Just clicking the Train button does nothing. Instead, you must first click on Train, followed by a pet command (such as Follow) . After you click on the pet command, you must type a verbal cue in your Chat Input bar that your pet will learn to associate with that command.
For example, if you want your pet to follow you every time your character says "Heel," you would first select Train then Follow from the radial menu. Immediately afterward, type "Heel " in the Chat Input bar. From that point forward, your pet will follow you every time you say "Heel."
You can use any words you want as verbal commands for your pet. If you possess multiple pets, you can train each to recognize different cues, allowing you to order them about independently; or, you might decide to make them all obey the same word so that they can act in concert.
You can also name your pet using the Train command. To do so, add any name to the verbal command. Select Train then Follow from the radial menu, and finish up by typing "Bobo Heel " in your Chat Input bar. Your pet will learn to recognize its name after you include it in three or four verbal commands.
- Follow: Makes your pet follow you.
- Stay: Tells your pet to stay in one spot. Most pets will sit still for a short time, and then begin loitering around the area. Pets remain in the world when you log off, but if left alone for too long, they revert back to a wild state and you will lose them.
- Attack: Commands the pet to attack your current target.
- Guard: Commands the pet to guard your current target (another player, NPC or creature). Your pet will attack anyone who attacks the guarded target. Guard is a toggle; you can command your pet to stop guarding by using the Guard option when you don' t have anything targeted (the ESC key clears all targets). Pets automatically guard their master, and can guard one other entity (including another pet).
- Befriend: Adds another targeted player to your Friends list (if the player is already on your Friends list, this will remove him or her) . Friends are able to give verbal orders to the pet.
- Get Patrol Point: Establishes a patrol route for your creature. Use this command wherever you are standing to add it to the pet' s patrol route, then move to the next spot in the intended route and use the command again. A route can have up to ten patrol points.
- Patrol: Commands a pet to start patrolling along an established route. Only usable once you have patrol points set.
- Clear Patrol Points: Erases all patrol points for your pet.
- Group: Commands your pet to join your group or, if already grouped, forces the pet to leave your group.
- Trick: Encourages your pet to perform a trick. You have two slots for a pet's tricks. Tricks are used to heal a pet' s Mind wounds. When wounded the pet will ask you to play; command it to perform tricks to heal the creature.
- Transfer: Transfers ownership of the pet to another player. You can only transfer the pet to a player who has the proper skills to tame and control the creature.
- Release: Releases your pet back into the wild.
- Feed: Gives your pet food to heal Action or Health wounds. Remember, the radial menu options are really only used for establishing verbal commands. Once you have the verbal commands set, you won' t use the radial menu very often.
PET HEALING
Your pets can suffer all forms of damage. To heal wound damage to a pet 's Action and Health, target the creature and select Feed from the radial menu to give your pet food from your Inventory.
If your pet receives a Mind wound, use the verbal Trick command when it asks you to play to heal its Mind.
If your pet dies in combat, it is gone forever, so be sure to heal pets often.
PET GROWTH
With proper care and feeding, your creature will grow to full size over time. In fact, given enough effort, your creature can grow even larger than a normal member of its species. This growth process can take days or even weeks. As a creature grows, its attributes increase dramatically.
12.2.
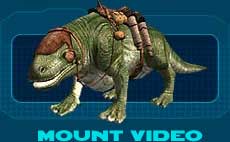
Mounts
Creature Handlers with the skill Creature Empathy IV are capable of training certain creature pets to be mounts. These animals may be tamed out in the wild or created by a bio-engineer. These creatures must also fit within certain size limitations; if they are too big or too small, the Creature Handler won't have the radial option available to train them as mounts. The mount may be traded or given like a normal pet and follows all the standard rules of pets.
Any character can ride a properly trained mount (up to a level 10 pet for non-creature handlers). When targeting your mount, select "Climb aboard pet" to get on the back of the mount. You can also store mounts in the data section of your datapad (default CTRL D). Use the call option to bring out the mount.
The advantage of riding a mount is being able to move at a sustained faster speed than normal running. Additionally, you may use the /gallop command to move faster.
The disadvantages of mounts are you cannot use special combat moves while mounted. Additionally, you cannot use any combat moves while galloping. Mounts will not attack or defend while being ridden, but will act like normal pets if they have no rider on them. Mounts cannot go inside buildings.
The six mounts available are:
12.3.
Player Vehicles
There are three different vehicle models in Star Wars Galaxies; Speeder Bike, Swoop Bike and the X34 Landspeeder. Each can be crafted by a Master Artisan. Similar to houses, vehicles require deeds to be used. If one wishes to purchase a vehicle, he must find a master artisan and acquire the deed after a successful crafting session. The deed can then be selected and, by holding down the left mouse button, can be used to "Generate Vehicle". The vehicle deed will disappear and a system message will inform the new owner that a new option has been entered in his data pad control. Vehicles can be "generated" from the owner's datapad control the same way mounts can be "called", by pressing (CTRL D) to call up the datapad and then by holding down the left mouse button over the vehicle icon. The radial menu will offer the "Generate Vehicle" option which calls the vehicle from the owner's datapad. Once the vehicle has been called, the owner can climb in it by using the radial menu. The controls of a vehicle are similar to those of a mount. By using the arrow keys, the vehicle will move forward and turn depending on what arrows key are used. The speed of the vehicle depends on the model chosen (outlined below).Each vehicle starts slowly, then moves at full speed, careening through the landscape with comfortable ease. Driving a vehicle does not require a certain skill in order to operate it. Anyone can own and drive a vehicle, provided he has enough credits to supply their friendly, local artisan with the funds. The owner can store his vehicle by using the radial menu, enabling it to be stored in the owner's datapad.
The Mounts and Vehicle systems are quite similar in usage, both being stored in the owner's datapad, and movability functions. However, there are a number of differences between the two ridable options. Unlike the mounts, vehicles have no AI. When an owner leaves the seat of his vehicle, the object stays stationary. Mounts, when dismounted, will become a pet and follow its owner. Vehicles will not follow its owner when left out in the open. Additionally, vehicles do not have a "train" option. One cannot "train" a vehicle to do tricks, to follow, or to stay. Vehicles do not have a "burst run" option and can only go as fast as they were made to go. Mounts, on the other hand, have a gallop option, which increases the speed of the pet. However, vehicles provide the fastest mode of transportation. The slowest of the vehicles provides faster travel to that of the quickest mount. Even when under attack, a vehicle grants the owner a faster getaway, versus a mount which will slow when it faces a hostile situation.
On a mount, the owner can use default attacks, defending himself when unwanted creatures become hostile. While riding in a vehicle, even default attacks are disabled, preventing "kiting" (attacking a creature and staying outside of it's attack range). However, like mounts, the vehicle can be targeted and attacked. The vehicle will accumulate damage when a creature, or another humanoid, succeeds in delivering an attack. If the vehicle becomes severely damaged, sparks will light, visually representing the damage the vehicle has received. If not properly repaired, the vehicle will lose its functionality and may possibly be destroyed. A damaged vehicle can be repaired by visiting a Parking Garage in any one of the many cities. To do so, simply get within 64 meters of a Vehicle Garage and use the repair command from your radial menu while targeting your vehicle. If your vehicle becomes damaged to 0, it becomes disabled and cannot be repaired.
The vehicles are compared, in detail, below:

Although the slowest of the three vehicles, the X34 Landspeeder has the highest hitpoints, enabling it to last longer under attack, and costs least to repair. Additionally it handles slopes better than the other two vehicles.

The Swoop bike boasts the highest speed of the three vehicles but, in contrast, has the lowest hitpoints and highest repair costs. It doesn't do well with slopes.

The Speeder bike offers an even statistics across the board, consisting of a medium speed, hitpoints and repair costs.
The functionality of the Mounts and Vehicles systems enhances the visual and mechanical game play within Star Wars Galaxies and provides a quicker way of travel for the commoner and wealthy alike.
<< Chapter | < Section | Table Of Contents | Section > | Chapter >>
|